Color adjust film scans
a step-by-step walkthrough

Connie, Chicago 2023
To start off, I do most of my edits in curves.
You can use any software that has the curve function. Some popular programs includes: Photoshop, Lightroom, and Afterlight (mobile).
Here I am using Adobe Lightroom.
Camera + Lens Combo for this shot:


RATED AT 400 ASA (+1)
Let's start the edit
💻
Let's start the edit 💻

STEP 1.
I always like start with bringing the master curve closer together as my first step in editing.

By deepening the black point and boosting up the white point, we get a better contrast and saturation already.
STEP 2.

The color curves could be scary to play with at first, but once you understand what they do, you can use them to your best advantage.

The Basics of Curves


I always starts with the blue curve first, because it is the least affective on skintones.
However, I do like to add a little bit of yellow in highlights for warmth.

after blue curve
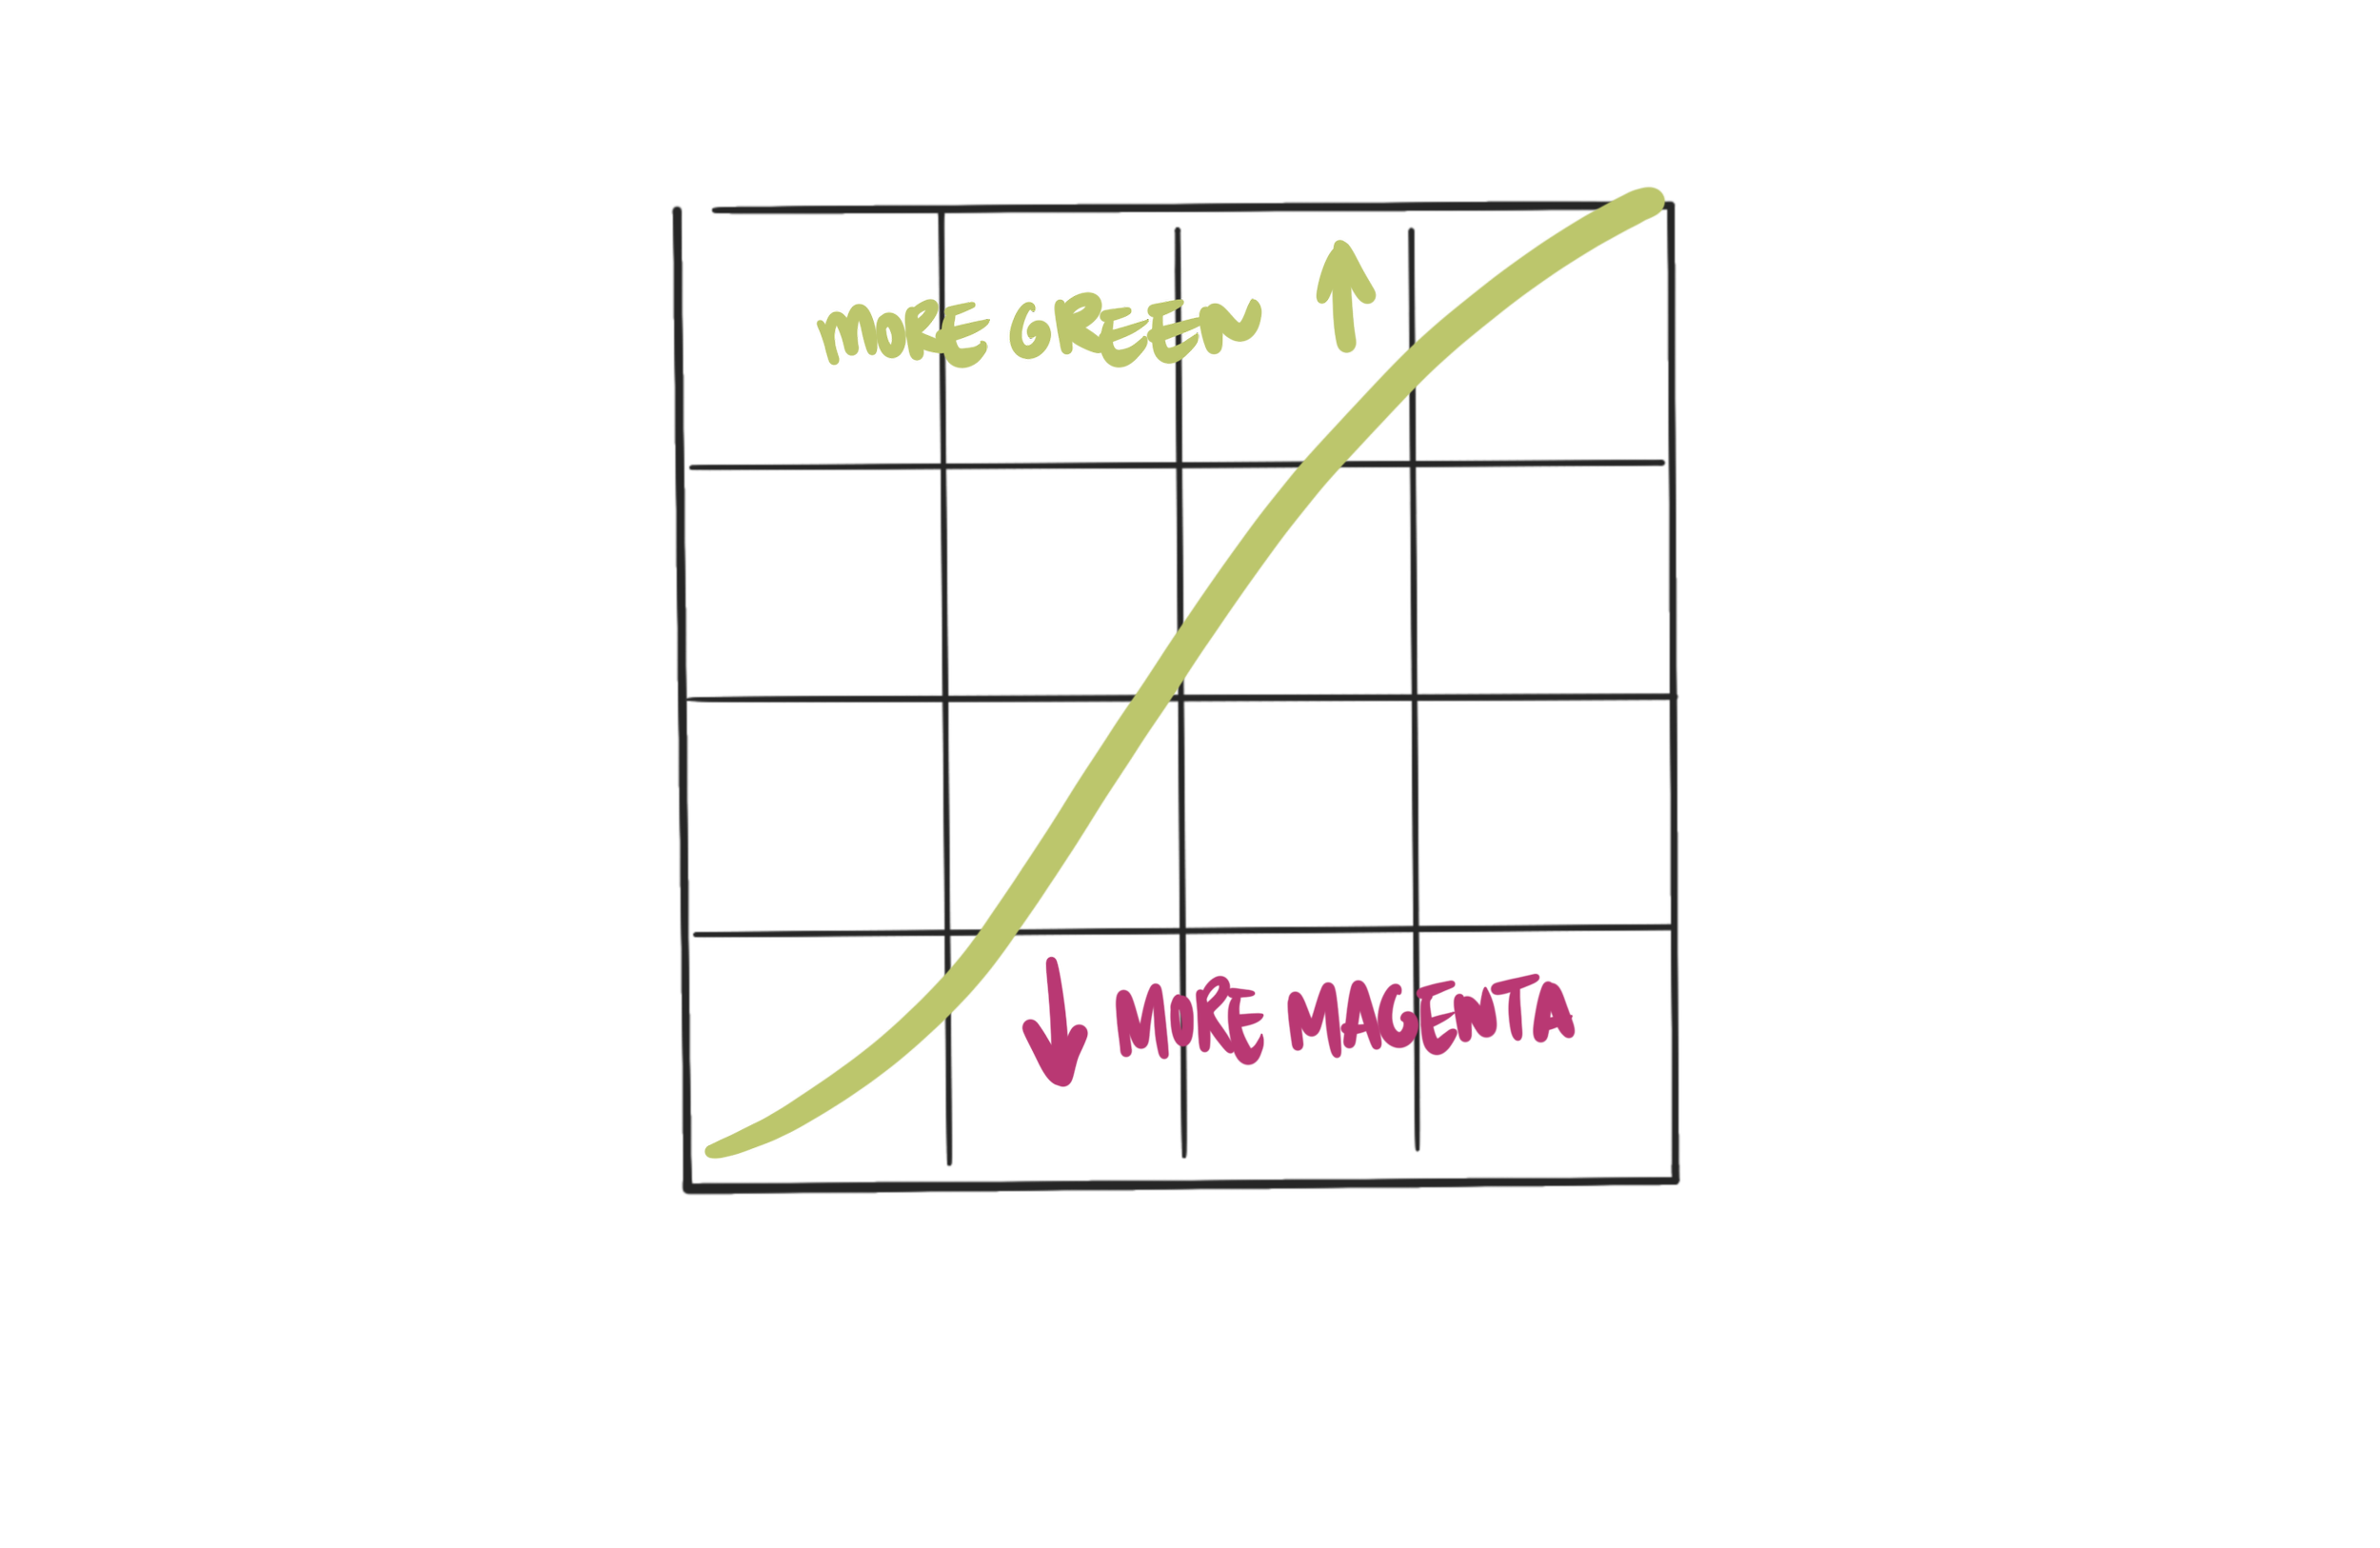
STEP 3.

Bring the green curve just slightly below the center point. This usually help with the skin tone to look more magenta.


(Do you notice the pink tone on her skin?)
STEP 4.
By this point, you should have a pretty decent color tone of your edit, now let’s do some minor slider adjustments.


annnnnd, drum roll please…
🥁🥁🥁
🥁🥁
🥁
TADA!

This is just my personal preference on how I like to color correct my film scans. I often work with flat scans, which means that they might not look dynamic to your eyes, but they pack the highest range of color and contrast to play around in the editing process. Think of them as RAW files from digital cameras.
That being said, if your labs usually deliver solid contrasty and saturated scans straight away, I do not recommend adjusting too much from them. This is because our eyes are not as well-trained as the lab technicians, and sometimes we can get overboard in the editing process, and we’d lose the qualities of film at the end.
The scan of Connie’s portrait was done by picturehouse+thesmalldarkroom in New York City. Their 20mb TIFF file gives me enough room to play in the edits. When I print this photograph in the darkroom, I’d use this digital edit as a guideline.
Overall, I hope that you’d pick up some useful tips from this step-by-step breakdown of how I color grade film scans, and feel free to apply them accordingly to your editing process.